By
By
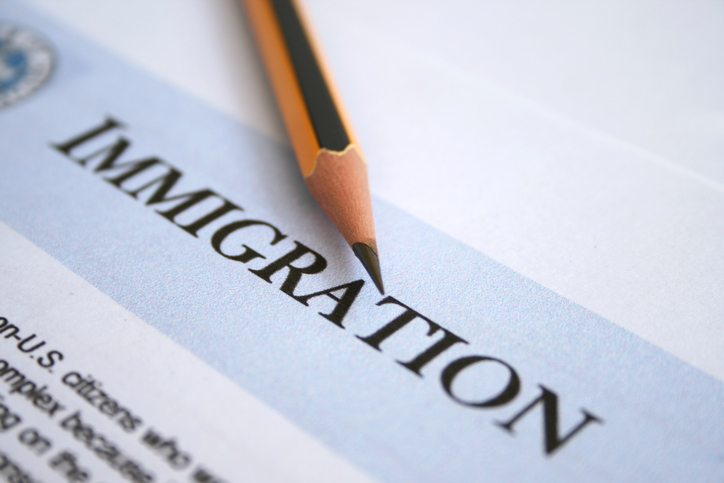
Sharing and Giving Back to Your Parents: Invite Them to Visit the U.S.
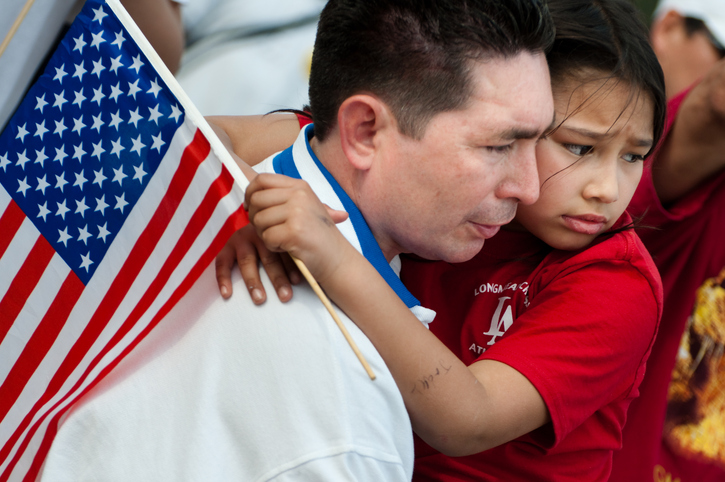
Wouldn’t it be great if you could give them the gift of America by helping them get a US B-2 Tourist visa? You have been living in the U.S. for a while now, achieved success and you would naturally love to share with them not only what this beautiful country has to offer but to give them a close-up and personal look into the person you have become.
Whether you are a U.S. citizen, permanent resident, H1B worker, or F1 student and planning to invite your parents over for a visit, it involves helping them get a US visitor visa, specifically a B1/B2 visa. This guide will walk you through each step of the application process, including filling out the DS-160 form, checking your visa status, and understanding the requirements to ensure their application is approved.
Step-By-Step Process For parents visitor Visa
Step 1: Prepare the Essential Documents for the Visa Application
Before applying for the B-2 visa, there are a few essential requirements to check:
- Valid Passport: Ensure your parents’ passports are valid for at least six months beyond their intended stay in the U.S. In many countries, it takes several weeks to months to get a passport. But in countries like India, with the introduction of Tatkaal in India, a passport can be issued in a week.
- Financial Preparation: If you are sponsoring the trip, ensure you have at least $10,000 in savings to demonstrate financial capability. Start saving early to avoid large deposits that might raise red flags during the interview.
- Health Insurance: Arrange for travel health insurance for your parents to cover emergencies, as medical expenses in the U.S. can be high.
Step 2: Provide Financial Sponsorship and Supporting Documents
If you are sponsoring your parents’ visit, you need to show proof of financial stability through the following documents:
- Bank Balance Letter: Obtain a signed and stamped Bank Account Balance Letter from your bank. The letter should indicate your account’s average balance and the account opening date. Banks like Chase provide this letter instantly, while Bank of America may take longer.
- Additional Proof of Funds: Submit your recent W-2 forms, pay stubs, and bank statements from the past six months.
- Affidavit of Support (Form I-134): Though optional, this form strengthens the case by affirming your financial responsibility during your parents’ stay.
Tip: Sudden large deposits before the visa application can raise suspicion, so start saving early to show consistent account activity.
Step 3: Include Employment Verification and Invitation Letters
Employment Verification for Workers and Students
If you are working in the U.S. on a visa (H1B, L1, F1, or as a Green Card holder), it’s important to provide the following documents:
- Employment Verification Letter: This letter, issued by your employer, should confirm your job title, salary, and employment status. It assures the consulate that you have a stable position in the U.S.
- Immigration Documents: Include copies of your current visa, I-94 form, and other relevant documents to demonstrate your legal status.
Documents for F1 Students
If you are an F1 student, you can submit a graduation invitation letter along with copies of your F1 visa, I-94, and I-20 forms to support the reason for your parents’ visit.
Step 4: Write an Invitation Letter and a Cover Letter for the Visa Officer
While not mandatory, writing an invitation letter can strengthen your parents’ visa application. This letter should clearly:
- Invite your parents to the U.S.
- Mention the purpose and duration of their visit (e.g., “visiting family for two months” or “attending graduation”).
- Outline any activities or events planned during their stay.
In addition to the invitation letter, it’s highly recommended to include a cover letter addressed to the visa officer. The cover letter should summarize the purpose of your parents’ visit and list the supporting documents provided in an organized manner. This helps the consular officer review the application more efficiently.
Step 5: Complete and Submit the DS-160 Form
The DS-160 is the official visa application form for U.S. visitor visas. Help your parents fill out the online visa application for the US visitor visa and make sure all biographical and travel information is correct. Each parent needs to submit a separate application. Here are some tips to ensure smooth completion:
- Declare Yourself as Preparer: If you are helping your parents fill out the form, make sure to declare yourself as the preparer.
- Group Application: After submitting the first application, use the “Create Family/Group Application” option to save time by copying shared information to the second application.
- Save Frequently: The DS-160 takes about 1-2 hours to complete. Save your progress frequently to avoid data loss.
- DS-160 Confirmation Page: Once submitted, print the DS-160 confirmation page with the barcode. This page is required for the visa interview.
Step 6: Pay the Visa Fee and Schedule the Interview
- Visa Fee Payment: The B-2 visa application fee is $185, non-refundable. Payment options vary by country; for example, in India, you can pay via NEFT, UPI, credit card, or cash. Keep the payment receipt safe, as it will be required during the visa appointment.
- Scheduling the Visa Interview: Schedule a visa interview at the nearest U.S. embassy or consulate in your parents’ home country. Use the U.S. Department of State’s Appointment Wait Time tool to find the earliest available slots. In India, the main consulate locations include New Delhi, Mumbai, Chennai, Hyderabad, and Kolkata.
Tip: Visa interview wait times may vary from a few weeks to several months, so plan accordingly. For emergencies, you can request an expedited appointment.
Note: Print, sign, and organize all key documents, including the I-134 (if applicable), invitation letter, and cover letter. Send originals of critical documents like employment and bank letters, keeping copies for your records. Use a reliable courier service such as DHL, FedEx, or UPS with tracking, which may cost up to USD 100. To avoid delays, ship early so your parents have everything they need well before the visa interview.
Step 7: Attend the Visa Interview and Biometrics Appointment
Biometrics Appointment
Your parents will need to attend a biometrics appointment to have their fingerprints and photos taken. This is usually scheduled a few days before the visa interview at a Visa Application Center (VAC).
Visa Interview Tips
During the interview, the consular officer will evaluate whether your parents are likely to overstay or work illegally. To increase the chances of approval:
- Provide Clear Answers: Your parents should state their reason for visiting—whether it’s tourism, a family reunion, or attending a specific event.
- Bring Evidence of Ties to Home Country: Include documents proving your parents’ employment status, property ownership, family obligations, or pension benefits to reassure the officer they will return home.
- Present All Required Documents: Your parents should carry all the documents mentioned above, including the invitation letter, financial statements, and travel itinerary.
Step 8: Handling Emergencies and Expedited Appointments
If there is an urgent need—such as a medical emergency or funeral—you can request an expedited visa interview.
How to Request an Expedited Appointment
- Pay the Visa Fee and Submit the DS-160 Form.
- Schedule a Regular Appointment through the U.S. Embassy or Consulate’s online system.
- Request Expedited Interview: Log in to your account, click “Expedite” on the appointment dashboard, and provide the details and supporting documents for your emergency.
- Wait for a Response: The consulate will review your request and email you back. If approved, follow the instructions to schedule your emergency appointment.
For expedited requests, you need specific documents:
- Medical Emergencies: Doctor’s letter explaining urgency.
- Funerals/Death of Family Member: Death certificate or funeral home letter.
- Urgent Business Needs: Letter from U.S. employer or business partner.
Note: Most requests aren’t approved. Provide detailed supporting documents. If denied, attend your regular appointment.
Medical Documentation from a U.S. Doctor or Medical Facility
If your parents are applying for a B-2 visa to seek medical treatment in the U.S., it is crucial to provide detailed and comprehensive medical documentation. This letter, issued by a U.S.-based doctor or medical facility, must clearly outline the treatment plan and associated costs to demonstrate the purpose and scope of the visit. Here’s what the letter should include:
- Treatment Plan: A detailed description of the medical condition and the recommended course of treatment. Information on the type of care (e.g., surgery, therapy, ongoing consultations).
- Duration of Treatment: Expected timeline, including the start and end dates of treatment, follow-ups, and recovery period (if applicable).
- Comprehensive Cost Breakdown: A full breakdown of expected expenses, including doctor’s fees, hospitalization, diagnostic tests, medications, and any other related costs.
- Statement of Financial Responsibility: A formal declaration from the sponsoring individual, organization, or institution assuming financial responsibility for all expenses. This statement should be backed by:
- Proof of financial capability: Bank statements, income tax returns, or other documents showing sufficient funds to cover treatment and associated expenses.
- Commitment letter: Documentation outlining who will bear the costs for transportation, medical care, accommodation, and living expenses during the visit.
Important: While providing these documents helps establish the medical necessity of the visit, it does not guarantee visa approval. All visa applicants must prove they do not have immigrant intent, meaning the visit is temporary, and they plan to return to their home country after treatment.
Maximizing the Chances of Approval: Submitting Supporting Documents
Visa applicants are often concerned that consular officers may not review all supporting documents presented during the interview. In some cases, even applicants with strong evidence of ties to their home country are denied visas without the officer thoroughly examining their materials. To minimize this risk, especially for complex or high-priority cases, it is advisable to submit relevant documents ahead of time.
How to Submit Supporting Documents in Advance
You can send key documents to the Non-Immigrant Visa Unit of the U.S. embassy or consulate handling your case. Although there is no guarantee they will review these in advance, this strategy has proven effective for some applicants. Here’s what to include:
- Copies of all supporting documents (medical documentation, financial proof, and travel itinerary).
- Sworn, notarized affidavit explaining the purpose of the trip and the applicant’s strong ties to their home country.
- Applicant’s name, case number, and interview date (from the visa scheduling notice).
- Copy of the Visa Interview Scheduling Notice.
Finding the Right Contact Information
Unfortunately, it can be difficult to obtain the correct email address for the Non-Immigrant Visa Unit at embassies or consulates, as the State Department has restricted public access to direct contact information in recent years. Visit the official website of the relevant U.S. Embassy or Consulate to look for any available submission guidelines.
Ties to Home Country: Demonstrating Non-Immigrant Intent
A primary concern for consular officers when reviewing B-2 visa applications is whether the applicant might overstay their visa or work illegally in the U.S. To increase the chances of approval, it’s crucial to help your parents demonstrate they have strong ties to their home country—economically, socially, and through family connections—showing they fully intend to return after their visit.
Documents to Demonstrate Strong Ties to the Home Country
The following documents can help prove that your parents have sufficient reasons to return to their home country:
- Notarized Property Document: Evidence of ownership of land, homes, or other assets shows financial stability and long-term commitments.
- Bank Statements: Recent statements demonstrating a healthy and stable financial situation signal their ability to support themselves.
- Pension or Employment Benefit Letters: For retirees or employed individuals, these letters prove ongoing income or retirement benefits that tie them to their country.
- Fixed Deposits and Financial Investments: Certificates of fixed deposits, bonds, or other financial instruments provide additional proof of economic stability.
- Recent Tax Returns: Submitting tax filings further highlights their financial responsibility and connection to their home country.
Note: If your parents don’t own property or have substantial financial assets, focus on other forms of strong ties, such as employment, family responsibilities, or community involvement. The key is to present a well-rounded case demonstrating their intention to return after the U.S. visit.
Common Mistakes to Avoid During the Visa Application Process
- Incomplete or Inconsistent Application:
- Carefully fill out every section of the DS-160 form and double-check all details. Inconsistent information (e.g., name, date of birth, or travel plans) can lead to delays or rejections.
- Follow the instructions thoroughly to ensure no required fields are left blank.
- Missing Supporting Documents:
- Ensure all essential documents are gathered, including bank statements, invitation letters, and accommodation details.
- If you are sponsoring the trip, include your financial documents and any necessary sponsorship letters (e.g., I-134 Affidavit of Support).
Visa Interview Preparation: Example Questions and Answers
During the interview, your parents will be interviewed by a U.S. consular officer. The interview usually takes 15 minutes and the officer will verify the information and assess the purpose of the trip. They should answer all questions truthfully and present all required documents.
Below are some common questions and suggested responses:
Purpose of Visit
- Why are you going to the U.S.?
I am visiting my [son/daughter] and touring the U.S. - What places do you plan to visit?
New York City, the Grand Canyon, Yellowstone, and Las Vegas.
Accommodation and Stay Details
- When are you visiting, where will you stay, and for how long?
I will stay with my [son/daughter] for __ months. - Why do you plan to stay for 6 months?
I want to spend quality time with my [son/daughter] and experience U.S. culture. - How will you cover expenses?
My [son/daughter] will cover all expenses, which will be around $100 to $300 per day.
About Your Child in the U.S.
- Where does your [son/daughter] live?
They live in [city/state], and their contact number is [+1 123456789]. - What visa does your [son/daughter] hold?
They have an H1B visa / Green Card. - What is their job and income?
They work as a [Job Title] at [Company] and earn $___ per year.
About You and Your Ties to Your Home Country
- What do you do for a living?
I am a [profession/occupation]. - How many children do you have, and where are they currently located?I have [number] children, and they live in [location].
- Have you ever been denied a visa for any country, including the U.S.?Answer honestly, and provide details if the officer asks.
- What ties do you have to ensure you will return?
I have family, a job, and property that require my presence at home. - Who will manage your property while you are away?
Relatives will take care of it during my absence. - Do you have medical insurance for your U.S. trip?
No, but my [son/daughter] will arrange insurance before my visit.
Preparing for Travel: What to Know After Visa Approval
After the interview, the consular officer will give a decision. If approved, the processing time for the tourist visa can take a few days to several weeks. Your parents should not book their travel until they receive their official B2 visa. The next step is to ensure they are fully prepared for their trip. This involves gathering travel documents, arranging health insurance, understanding U.S. customs procedures, and reviewing important visa rules.
Visa Validity and Entry Guidelines
- Multiple Entry: B1/B2 visas are typically valid for up to 10 years with multiple entries. While there is no limit on the number of visits, frequent travel or long stays may raise concerns with Customs and Border Protection (CBP).
- Maximum Stay: Each stay can last up to 6 months. Extensions are possible but must be requested before the visa expires. The exact duration varies per visa holder but should not exceed 6 months.
Make sure the visa remains valid beyond travel dates to avoid issues at the border.
Special Notes for Green Card Holders and Intending Immigrants
If your parents are planning to move permanently, they may need to apply for a green card or permanent residence through a different visa category. Do not get a tourist visa with the intent to adjust your status. This is considered visa fraud and would likely result in a permanent bar to future immigration.
If you are a Green Card Holder, you can not sponsor your parents’ Green card. Green card holders can sponsor some family members for permanent residence, such as spouses and minor, unmarried children. This is a separate and more complex process than getting a tourist visa.
B-1/B-2 Visa Outcomes and What to Do if Denied
Applying for a B-1/B-2 visa to visit the U.S. for business or pleasure can result in different outcomes. Understanding these outcomes and what to do if your application is denied will help you navigate the process better.
Visa Outcomes
- Approved: If your visa is approved, it will be stamped in your passport. You can then travel to a U.S. port of entry where a Customs and Border Protection (CBP) officer will determine your admissibility and length of stay.
- Administrative Processing: Sometimes the consular officer may require additional administrative processing. This is not a denial but a delay while they review your case further. You might be asked to submit additional documents or information.
- Denied: A visa denial usually falls under Section 214(b) of the Immigration and Nationality Act (INA) which presumes all applicants intend to immigrate until they can prove otherwise.
What to Do if Your Application is Denied
- Understand the Denial: The denial notice will state the reason for the denial. Common reasons are weak ties to your home country, incomplete documents, or unclear purpose of travel.
- Address the Issues: Review the denial reasons and identify how to address them. This may require providing additional evidence such as proof of employment, family ties, financial stability, property ownership, or detailed travel plans.
- Reapply: There’s no waiting period to reapply after a denial. However, make sure you address the initial reasons for denial in your new application. Include additional documents and explanations to resolve the concerns raised earlier. Be prepared to pay the application fee again and possibly attend another interview.
- Get Legal Advice: If you’re unsure of the denial reasons or how to address them, consulting an immigration attorney can be helpful. A lawyer can help you understand the denial, gather the necessary documents, and strengthen your application.
- Letter of Reconsideration: In some cases, you can write a letter requesting reconsideration of your application. This letter should state the reasons for the denial and provide new evidence to support your case. However, this option is less common and does not often result in approval.
- Explore Other Visa Options: Depending on your situation, you may want to consider applying for another type of visa that fits your travel purpose (a work or investor visa for example). Consult an immigration attorney to explore these options.
Common Reasons for B-1/B-2 Visa Denials
- Errors on the DS-160 Form: Inaccurate or missing information can result in denial.
- Applying from a Third Country: Applying outside your home country may increase the risk of rejection.
- High Denial Rate Country: Applicants from countries with high denial rates should provide strong supporting evidence.
- Unclear Travel Itinerary: Present a detailed, well-documented travel plan.
- Financial Issues: Demonstrate sufficient funds to cover your stay through bank statements and income proof.
- Weak Ties to Home Country: Submit evidence such as employment letters, family connections, or property ownership.
- Previous Visa Denials: Address past denials with clear explanations and new supporting documents.
- Prior Immigration Violations: Overstays or other violations can impact future applications.
- Unprepared for Interview: Prepare thoroughly and answer questions honestly.
- Criminal History: Depending on the offense, you may need a Waiver of Inadmissibility.
CBP Decisions: What Happens If Entry Is Denied at the U.S. Border?
Getting a B1/B2 visa is only the first step in visiting the U.S.; you must also be approved by U.S. Customs and Border Protection (CBP) officers at the port of entry. While the vast majority of B1/B2 visa holders are granted entry by CBP, sometimes there are problems at the border.
CBP officers may deny entry to a B1/B2 visa holder for:
- Misrepresentation: Providing false or misleading information or documents.
- Immigration Intent: Suspected intent to immigrate rather than visit temporarily.
- Insufficient Funds: Lack of sufficient funds to cover your stay.
- Prior Violations: History of immigration violations or overstays.
- Security Concerns: Suspicion of involvement in criminal activities or posing a security threat.
CBP’s Options if Entry is Denied:
- Expedited Removal:
- You may be removed from the U.S. without a hearing, typically for misrepresentation or inadmissibility.
- This results in a 5-year reentry ban.
- Visa Cancellation Without Prejudice:
- CBP may cancel your B1/B2 visa without prejudice.
- The visa is invalidated, but the cancellation is not due to wrongdoing; you simply do not meet the entry requirements at that time. You can reapply for a new visa in the future and the cancelled visa won’t affect your new application.
- Withdrawal of Application for Admission:
- You may be allowed to withdraw your application for admission.
- This option allows you to avoid formal removal proceedings, requires you to leave the U.S. immediately (usually on the next available flight), and imposes no re-entry ban so you can reapply for entry later.
- Deferred Inspection:
- CBP may defer your inspection to a later date.
- You may be allowed into the U.S. temporarily to undergo a detailed inspection at a CBP office later. This option is used for complex cases requiring additional documentation or review.
- Not commonly used but provides a temporary solution pending further examination.
Changing or Adjusting Status After Entering on a B1/B2 Visa
Although B-1/B-2 visas are for temporary visits, it is possible to change or adjust your status under certain conditions. For example, parents of U.S. citizens (21 or older) may adjust their status to permanent residence.
As mentioned above, an applicant cannot apply for a B-2 tourist visa or present a B-2 tourist visa to CBP with the intention of filing for adjustment of status on that trip. But they can file for adjustment of status if circumstances change AFTER arriving in the U.S.
Filing a Change/Adjustment of Status Application
- Submit your application to U.S. Citizenship and Immigration Services (USCIS) before your current status expires.
- Timing: Apply at least 45 days before your B1/B2 visa expires to avoid gaps in your status.
- Eligibility: Ensure your new purpose aligns with the new visa type and that you haven’t violated your current status.
- Approval: USCIS will review your case and make the final decision on your status change or adjustment.
Preconceived Intent: A Risk When Changing Status
USCIS closely examines the intentions behind status changes. Applying for a change too soon after arrival—within 90 days—can raise suspicion of preconceived intent to immigrate.
What is Preconceived Intent?
B1/B2 visas are for short-term visits. If you apply to change or adjust your status shortly after arrival, usually within 90 days, it may imply that you had the intent to stay permanently which is not allowed under a B1/B2 visa.
Risks of Preconceived Intent
- Visa Revocation or Removal: If found guilty of misrepresentation, you could face removal proceedings and a ban on future U.S. entry.
- Denial of Status Change: USCIS may reject your change request, believing your initial purpose was to immigrate.
- Permanent Record of Misrepresentation: Any misrepresentation will be recorded permanently, making future visa applications complicated.
Indicators of Preconceived Intent
- Timing: Applying for a status change soon after entry is suspicious. USCIS looks closely at applications made within 90 days of entry.
- Type of Status Change: Changing from visitor visa to status allowing long-term stay or employment will be scrutinized.
- Previous Visa Issues: Quick applications after prior visa denials for immigrant intent will raise red flags.
- Inconsistent Statements: Discrepancies between your visa interview statements and subsequent actions will be problematic.
How to Avoid Issues
- Be Honest and Consistent: Ensure your visa interview and actions align with your intentions.
- Don’t Rush: Avoid filing for a status change immediately after entry unless unexpected circumstances arise.
- Consult an Attorney: A legal expert can help you navigate status changes and avoid preconceived intent issues.
Frequently Asked Questions about U.S. B-1/B-2 Visas
By following this process, you can guide your parents through the U.S. tourist visa application. Each step from online application to interview to travel preparation requires attention to detail. With proper preparation and knowledge of the required documents, your parents will be ready to get their visitor visas and enjoy their U.S. trip.
For more information and assistance, check the USCIS website or consult with immigration and visa lawyers. This will ensure your parent’s application is complete and ready to submit and increase their chances of approval.
Get personalized, end-to-end visa support with Herman Legal Group.
Expert Legal Help At Herman Legal Group, LLC
24/7 Support, Just A Call Away!